


Application, Products
10 Common Mistakes in Wire Marking and How to Avoid Them

Jan
Estimated reading time: 7 minutes
Key Takeaways
- Wire marking is essential for safety and troubleshooting; mistakes can lead to major issues.
- Common mistakes include using low-quality materials, inconsistent labeling schemes, and poor label placement.
- Establish clear labeling standards and always mark both ends of wires for clarity and ease of tracing.
- To enhance durability, avoid using handwritten labels and ensure labels are easy to read and well protected.
- By avoiding these 10 common wire marking mistakes, you improve the quality and professionalism of electrical work.
Clear and accurate wire marking is a cornerstone of professional electrical work. It’s not just about tidiness; it’s a fundamental practice that ensures safety, simplifies troubleshooting, and streamlines future maintenance. A well-marked panel or installation communicates its logic clearly to any technician who works on it. However, simple mistakes in the marking process can lead to significant problems, including costly downtime, safety hazards, and compliance issues.
This post will guide you through ten of the most common wire marking mistakes and provide practical, actionable advice on how to avoid them. By sidestepping these frequent errors, you can enhance the quality, safety, and efficiency of your electrical projects.
1. Using Incorrect or Low-Quality Materials
One of the most frequent errors is choosing the wrong materials for the job. Not all labels are created equal. Using basic paper labels or general-purpose adhesive tapes in an industrial environment is a recipe for failure. These materials can’t withstand exposure to heat, moisture, chemicals, or UV light, causing them to peel, fade, or become illegible over time.
How to Avoid It:
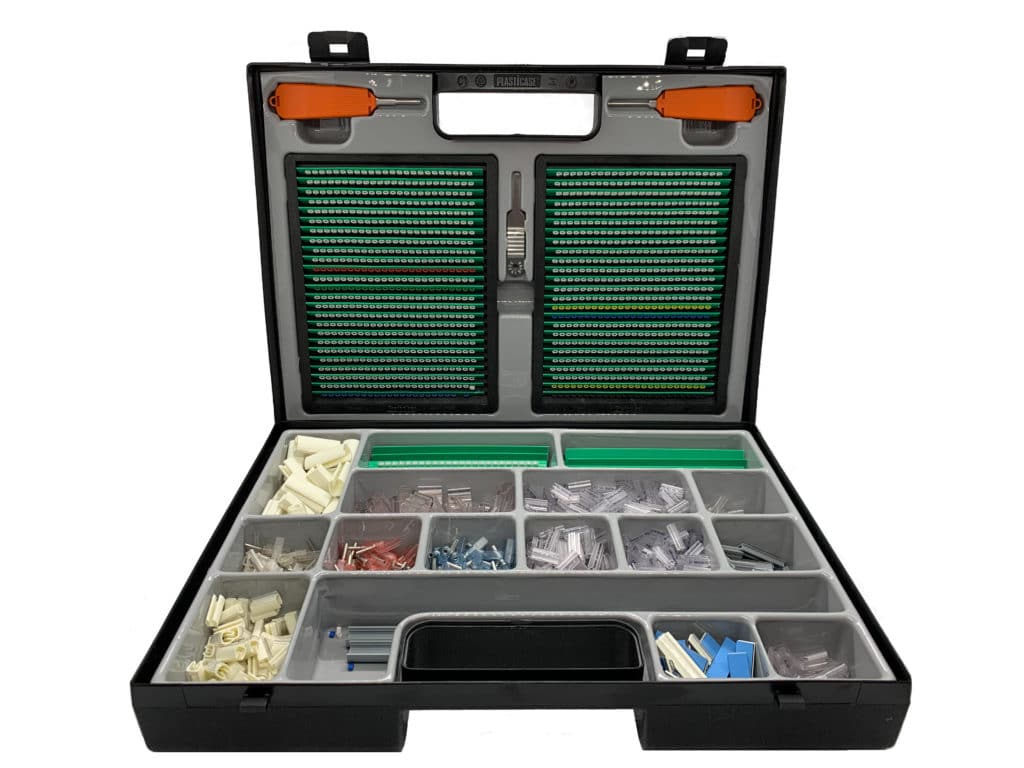
Always select marking materials specifically designed for electrical applications. Consider the environment where the wires will be located. For high-heat areas, use heat-resistant markers. In environments with oil or chemical exposure, choose solvent-resistant labels. High-quality systems like the Grafoplast® TRASP® system utilise durable marking elements protected by transparent sleeves, ensuring the labels remain clear and secure for the life of the installation.
2. Inconsistent or Illogical Labeling Schemes
Without a standardised system, wire marking can become chaotic. Different technicians might use different abbreviations or formats, turning a control panel into a confusing puzzle. One person might label a wire “PMP1_PWR,” while another labels a similar wire “Power to Pump 1.” This lack of consistency makes troubleshooting slow and frustrating.
How to Avoid It:
Establish a clear, logical, and consistent labeling convention before starting any project. This standard should be documented and shared with your entire team. A good system typically includes information such as the source, destination, wire type, and circuit number. Using a standardised format ensures that anyone can understand the wiring schematic at a glance.
3. Poor or Insecure Label Placement
Where you place a label is just as important as what’s on it. A marker that is hidden, obscured by other components, or placed too far from the termination point is not helpful. Likewise, labels that can easily slide out of position or rotate around the wire can cause confusion, especially in dense wire bundles.
How to Avoid It:
Place markers close to the termination point on both ends of the wire so they are easily visible without needing to move other components. For systems that use individual characters, a dual-recess sleeve is essential. This design feature locks the marking elements in place, preventing them from spinning or sliding and ensuring the code remains legible.
4. Completely Neglecting to Label Wires
In a rush to complete a project, some may be tempted to skip labelling altogether, especially for what seems like a simple installation. This is a critical error that creates immense challenges down the line. An unmarked panel is a black box, forcing future technicians to spend hours manually tracing wires to diagnose even the simplest fault.
How to Avoid It:
Make wire marking a non-negotiable step in your workflow. Treat it with the same importance as making a secure termination. The time saved during the initial installation is insignificant compared to the hours or even days that will be lost during future maintenance or emergency repairs. Building the habit of labeling every wire, every time, is a hallmark of a true professional.
5. Using Handwritten Labels That Smear or Fade
Handwritten labels, often done with a permanent marker on tape, are a common shortcut. While quick, they are notoriously unreliable. Ink can smear during application, fade over time when exposed to light, or wash away when it comes into contact with solvents or even moisture. An illegible label is no better than having no label at all.
How to Avoid It:
Invest in a professional, high quality marking system. Pre-printed marking elements or a portable thermal transfer printer, like the EVOMAX or GRAFOPRINT systems, produce crisp, durable, and professional-looking labels that will not smear, smudge, or fade. These systems create high-contrast text that remains readable for years, ensuring long-term reliability.
6. Not Pre-Printing Labels for High-Volume Jobs
For large projects, like wiring multiple identical control panels, applying individual character markers one by one can be incredibly time-consuming. This manual process not only slows down production but also increases the risk of human error, as technicians may misplace characters or make typos.
How to Avoid It:
For high-volume or repetitive tasks, leverage a thermal printing system to pre-print entire marking strips. This allows you to create multiple identical labels quickly and accurately. Systems like the EVOMAX printer can produce durable tags and strips that are ready for fast application, dramatically improving efficiency and ensuring consistency across all units.
7. Choosing the Wrong Size Sleeve or Marker
Using a sleeve that is too large for a wire can cause it to slip off, while a sleeve that is too small can be impossible to install or may damage the wire’s insulation. Both scenarios compromise the integrity of your marking system.
How to Avoid It:
Always verify the outer diameter (OD) of your wire or cable before selecting a sleeve. Reputable suppliers provide clear sizing charts that match their sleeves to specific wire gauge ranges. Using the correct size ensures a snug, secure fit that will stay in place without damaging the wire. For situations where wires are already terminated, snap-on sleeves offer a flexible solution.
8. Failing to Mark Both Ends of the Cable
Marking only one end of a cable is a job half-done. When a wire runs from one panel to another or across a large piece of equipment, a label at only one end makes tracing its path incredibly difficult. A technician at the destination end will have no immediate way of identifying the wire’s function or origin.
How to Avoid It:
Adopt the best practice of always marking both ends of every wire and cable. This simple rule provides complete clarity, regardless of which end of the wire a technician is looking at. It is a fundamental step that drastically speeds up installation, testing, and troubleshooting.
9. Creating Labels That Are Hard to Read
The goal of wire marking is clarity. Using a font that is too small, text that is too long, or a color combination with poor contrast defeats the purpose. A label that you have to squint at or decipher is an inefficient label.
How to Avoid It:
Prioritise legibility. Use a simple, clear font and ensure the text size is large enough to be read easily from a typical working distance. Stick to high-contrast color combinations, such as black text on a white or yellow background. Keep codes concise but informative, avoiding overly complex abbreviations that could be misinterpreted.
10. Not Protecting the Marking Elements
Even the best marking tags can be compromised if they aren’t properly protected. In an industrial setting, wires are exposed to dust, dirt, oil, and abrasion. An unprotected marking element will quickly become dirty, scratched, or damaged, rendering it unreadable.
How to Avoid It:
Use a system that encapsulates and protects the marking. The Grafoplast® TRASP® system is a perfect example. It uses transparent sleeves that act as a protective shield for the marking elements inside. This design keeps the printed characters clean and free from abrasion, ensuring the label remains pristine and legible throughout the equipment’s lifespan.
Conclusion
Effective wire marking is a skill that separates good electrical work from great electrical work. By avoiding these ten common mistakes, you can improve the safety, professionalism, and long-term serviceability of your installations. Adopting a high-quality, systematic approach to labeling saves time, prevents confusion, and ultimately protects your reputation.
Investing in a reliable system and adhering to consistent best practices ensures that your work remains clear and serviceable for years to come, benefiting everyone who interacts with it in the future.